The 7 Court Conditions — what each one changes (1.4)
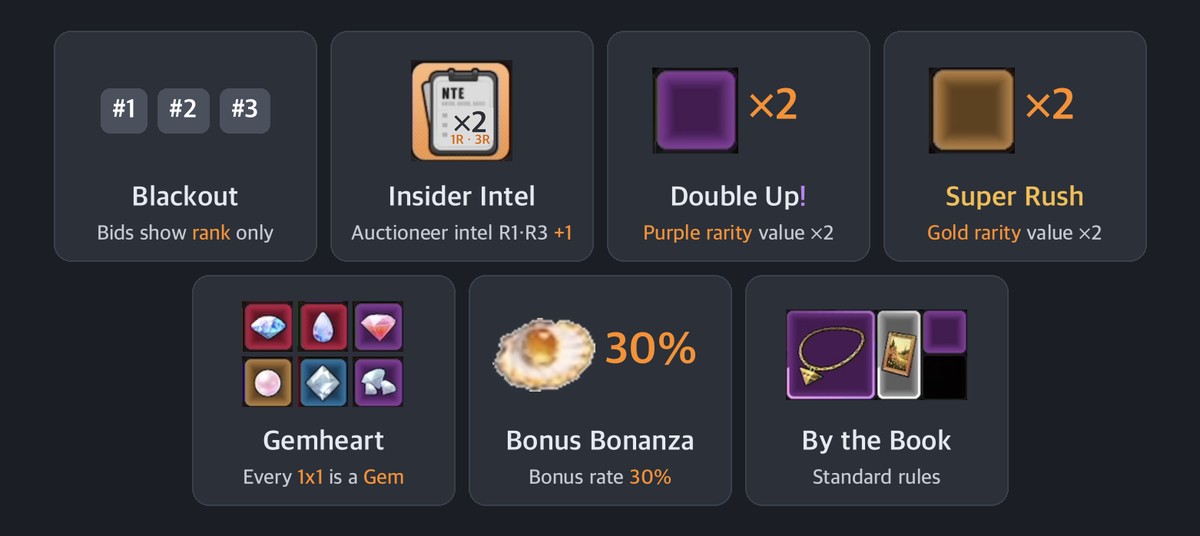
What changes in a Going, Going, Gone! match with a court condition — Blackout, Insider Intel, Double Up!, Super Rush, Gemheart or Bonus Bonanza — and how to adjust your bets. It includes each hall's odds and which characters each condition favors.
Matches with a condition
In Pearl, about one match in three has a condition — Blackout is the most common
| Condition | Pearl | Coral | Shell |
|---|---|---|---|
| Blackout | 20% | 10% | 7.5% |
| Insider Intel | 5% | 5% | — |
| Double Up! (Purple ×2) | 5% | 5% | 2.5% |
| Super Rush (Gold ×2) | 2.5% | 2.5% | — |
| Gemheart | 0.5% | 0.5% | — |
| Bonus Bonanza | 2% | 2% | 10% |
| By the Book | 65% | 75% | 80% |
- The condition shows before the match starts — check it before you pick your Device Set
Blackout — rankings instead of amounts
You can't see others' amounts, so you bid on your own information alone — probing and pressure bids don't work well
- For everyone: you don't know rivals' amounts, so you can't work out snipe thresholds — the rankings only tell you who's in first
- If the same player is first every round, they know about a high-value piece — the ranking itself is information
- Characters with lots of information (
 Haniel ·
  Chiz ·
  Blackbird) have the edge — others can't read your information from your bids
 - Characters with little information (
 Hathor ·
  Adler) shouldn't overreach in round 1 — bid only the floor of the board value
 - A probe like bidding 800K on the Eternal Heart in Coral is weak in a Blackout — rivals can't see the amount
Insider Intel — one more from the Auctioneer in rounds 1 and 3
A match where everyone knows more — information characters lose some of their edge and bids converge
- For everyone: more Auctioneer reveals bring everyone's board-value estimates closer — the end is decided by tiny margins, so work out snipe thresholds exactly, down to the 1
 Daffodill's total count and Blackbird's ① count can overlap with the Auctioneer Public Intel — when they do, you learn nothing new
- Choose which Device to use after seeing the round-1 Auctioneer Public Intel — so you don't pay again for what's already public
Double Up! — Purple value ×2
Purple pieces are cheap, so the board value barely changes — only about 60K more per Pearl board
- The Purple average and total from the Auctioneer and Devices are already doubled — turn on [Purple rarity ×2] in the Combo Finder and enter the value as is
- Purple: about 9 per Pearl board · 60K in total, about 8 in Coral · 50K in total — even doubled, it's only a few % of the board value
- Adler reveals every Purple silhouette in round 4 — only slightly more welcome in this match
- Board value is still decided by Red — play as usual
Super Rush — Gold value ×2
Gold is a big share of board value — the Gold count becomes a new axis of board value
- Gold: about 7.5 per Pearl board · 530K in total, about 5.7 in Coral · 300K in total — doubled, that's +530K in Pearl · +300K in Coral
- The Gold average and total are already doubled — turn on [Gold rarity ×2] in the Combo Finder
- Doubled, a pricey Gold like Giovanni's Gilded Statue (271,827) · Flatbread (202,798) is worth as much as a Red — a 4×5 Gold silhouette, settled by its shape alone, is a welcome sight
 Giovanni's Gilded Statue271,827
 Flatbread202,798
 - Characters that learn the Gold count — Haniel (rarity) · Daffodill (Purple + Gold + Red count) — have the edge
Gemheart — every 1×1 becomes a Gem
Every 1×1 on the board becomes a random Gem 1×1 — more spots where the Eternal Heart can appear
- A Pearl board has about 12 1×1s, a Coral board about 10 — every one of them becomes a Gem 1×1
- The game hasn't published how often each Gem 1×1 appears — assuming all 16 come up equally, the chance at least one Eternal Heart (1,314,520) appears is about 53% in Pearl · about 49% in Coral
 Eternal Heart1,314,520
 - A 1×1 Red color cell is one of just two: the Eternal Heart or Teardrop (50,000) — Cloudveil Cup (500,000) · "Geometric" Decor (61,803) · Chaotic Core (61,740) aren't on this board (they're not Gems)
 Teardrop50,000
 Cloudveil Cup500,000
 "Geometric" Decor61,803
 Chaotic Core61,740
 - When
 Hotori reveals the Gem type, the 1×1 silhouettes are almost all Gems — the 1×1 count is your number of Eternal Heart candidates
 - It's rare at 0.5% — if you get it, look at the 1×1 color cells first
Bonus Bonanza — 30% Bonus
When a rival wins at a loss, the Bonus triples — following to the end to push the price up pays off
- The normal Bonus is 10% of the winner's loss; under Bonus Bonanza it's 30%
- For everyone: if the board value is uncertain, follow to the end to push the price up and drop out at the last moment — if a rival wins it at a high price, your Bonus is big
- Conversely, if you win, 30% of your loss goes to the others — win only when you're sure of the board value
- In Shell, one match in ten is Bonus Bonanza — the condition you'll see most there
By the Book, and each character at a glance
Anything other than the six above is By the Book — each condition favors different characters
| Character | Favorable conditions | Unfavorable conditions |
|---|---|---|
| Haniel | Blackout · Super Rush | Insider Intel (your edge shrinks) |
| Chiz | Blackout | Insider Intel |
| Hotori | Gemheart (Gem 1×1s) | Blackout (learns late) |
| Daffodill | Super Rush | Insider Intel (counts overlap) |
| Blackbird | Blackout | Insider Intel |
 Jiuyuan Jiuyuan | By the Book | Blackout |
| Adler | Double Up! | Blackout |
 Edgar Edgar | Bonus Bonanza (knows every low-rarity piece) | Super Rush |
| Hathor | Bonus Bonanza (following through round 5) | Blackout |
- The table is a starting point — on each board, the Auctioneer Public Intel and your Devices make a bigger difference
See also
Auctioneer Public Intel and court conditionsThe three halls comparedThe 9 characters