
Device Guide
What each of the 17 device sets contains, what every item reveals, and what it costs. Click a name for the item table and the strategies that use it.
What devices reveal · How to use themShow details ▾
What devices reveal — how it looks on the board
- Size — silhouette
The collectible's size and shape appear on the board as a gray shape. You don't know its color or identity yet, so every collectible of that shape is a candidate (in Auction Simulator, click the slot to see the candidate list). It picks at random among collectibles whose silhouette you don't know yet.
- Rarity — color
Tells you a collectible's color (rarity). If you already know its shape, the silhouette is painted in that color; if not, the color shows on just one of the slots it takes — so a single colored slot may be a real 1×1 collectible or one slot of a bigger one. Guess the shape from the empty slots around it.
- Collectible — identity
The picture is revealed, so you learn the identity and even the price. It picks at random, so it can land on a collectible whose identity you already know (seen with a character ability or an earlier round's device) — and that pick gives no new information.
- Numbers — average · total · count · slots
A single number measured across every collectible that meets the condition. Averages have their decimals dropped, so entering one in the Combo Finder works backward to the compositions that produce that number. Total is the sum of prices, count is how many, and slots is the sum of the slots they take.
- Special · Top — items with a fixed target
Special items (Size · Rarity · Collectible · Total) pick the one collectible taking the most slots on the board — use them to check big pieces like 5×5 or 4×5. Top Collectible reveals the identity of the highest-rarity collectible among those you have no information on yet.

Tips
- ·One item per round — what you use in 1R is where reading the board begins. To pin down expensive pieces directly, use Collectible (identity); to see where the Reds are first, use Rarity.
- ·With random Devices, where the hits land is information too — if a Collectible or Rarity Device picks items low on the board (below the first screen), the board is long with many Collectibles; if every hit sits near the top, it's a small board.
- ·Number items pair with the Combo Finder — when you get a Gold average, Gold total, Purple total, or 2-slot/9-slot average, enter that value in the Combo Finder to see the possible compositions.
- ·Read silhouettes and colors together — once a silhouette also has a color, the candidates narrow to collectibles of the same shape and color; for a single colored slot, guess the shape from the empty slots around it.
- ·Fill in the side you don't know yet — characters whose abilities show silhouettes (Chiz, Hotori) get more from Rarity and Collectible Devices, and when you know rarities first (Haniel from 2R, or a board where the auctioneer revealed rarities), the Size Device is worth more.
- ·Your cost per match is the price of the items you used — you buy a set once at the set price, and restock only the items you used in a match at their price.
Choosing by Hall
- ·Shell — board values are small, so no tools or a Basic set (2,000) is often enough.
- ·Coral — the Intermediate (5,000) and Type (10,000) sets work well. If you're new, Haniel with a Type set is recommended in the order Daily Goods → Antique → Gem.
- ·Pearl — board values are large, so most Pearl strategies in the Playbook use Advanced (50,000) or higher.
17 Device Sets
- Basic All-roundMax cost 2,000· 0 strategy articles
 Rarity (Mini)
 Size (Mini)
 Collectible (Mini)The cheapest all-round set — a little of everything: 4 silhouettes · 2 colors · 1 identity.
- Basic DataMax cost 2,000· 0 strategy articles
 Green count
 Green average
 Green slots
 Green totalA set holding only four numbers about Green collectibles (count · average · slots · total).
- Intermediate All-roundMax cost 5,000· 0 strategy articles
 Rarity (Small)
 Size (Small)
 Collectible (Small)
 Blue averageThe three shared Intermediate items (Rarity 4 · Size 6 · Collectible 2) + Blue average.
- Intermediate ValueMax cost 5,000· 1 strategy articlesRarity (Small)Size (Small)Collectible (Small)
 Purple totalThe three shared Intermediate items + Purple total.
- Intermediate CountMax cost 5,000· 0 strategy articlesRarity (Small)Size (Small)Collectible (Small)
 Blue countThe three shared Intermediate items + Blue count.
- AntiqueMax cost 10,000· 2 strategy articles
 Antique Rarity
 Rarity (Medium)
 Size (Medium)
 Collectible (Medium)
 Purple averageA type rarity Device that colors only that type's Collectibles + more Rarity, Size and Collectible than Intermediate — the Purple average is usually left unused.
- GemMax cost 10,000· 2 strategy articles
 Gem RarityRarity (Medium)Size (Medium)Collectible (Medium)Purple averageA type rarity Device that colors only that type's Collectibles + more Rarity, Size and Collectible than Intermediate — the Purple average is usually left unused.
- TechMax cost 10,000· 0 strategy articles
 Tech RarityRarity (Medium)Size (Medium)Collectible (Medium)Purple averageA type rarity Device that colors only that type's Collectibles + more Rarity, Size and Collectible than Intermediate — the Purple average is usually left unused.
- FoodMax cost 10,000· 0 strategy articles
 Food RarityRarity (Medium)Size (Medium)Collectible (Medium)Purple averageA type rarity Device that colors only that type's Collectibles + more Rarity, Size and Collectible than Intermediate — the Purple average is usually left unused.
- Daily GoodsMax cost 10,000· 2 strategy articles
 Daily Goods RarityRarity (Medium)Size (Medium)Collectible (Medium)Purple averageA type rarity Device that colors only that type's Collectibles + more Rarity, Size and Collectible than Intermediate — the Purple average is usually left unused.
- AnomalyMax cost 10,000· 0 strategy articles
 Anomaly RarityRarity (Medium)Size (Medium)Collectible (Medium)Purple averageA type rarity Device that colors only that type's Collectibles + more Rarity, Size and Collectible than Intermediate — the Purple average is usually left unused.
- Enhanced All-roundMax cost 15,000· 0 strategy articlesRarity (Medium)Size (Medium)Collectible (Medium)
 Size (Special)
 Purple slotsRarity · Size · Collectible (Medium) + Size (Special) + Purple slots.
- Advanced All-roundMax cost 50,000· 16 strategy articles
 Rarity (Large)
 Size (Large)
 Collectible (Large)
 Gold total
 Gold slots
 2-slot averageThe three shared Large items (Rarity 8 · Size 10 · Collectible 5) + Gold total · Gold slots + 2-slot average.
- Advanced RarityMax cost 50,000· 1 strategy articlesRarity (Large)Size (Large)Collectible (Large)
 Purple count
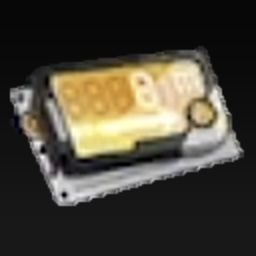 Gold average
 Rarity (Special)The three shared Large items + Purple count · Gold average + Rarity (Special).
- Mega RarityMax cost 100,000· 4 strategy articles
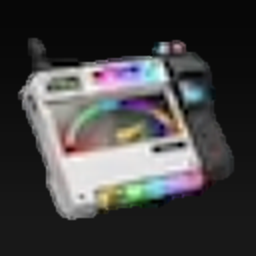 Collectible (Special)
 Rarity (Mega)
 Size (Mega)
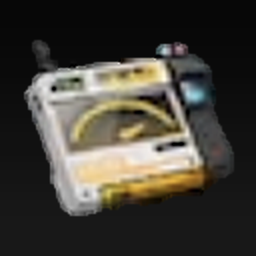 Collectible (Mega)
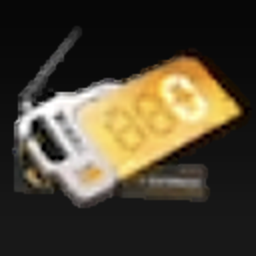 Gold countCollectible (Special) + the three shared Mega items (Rarity 10 · Size 12 · Collectible 6) + Gold count.
- Mega TotalMax cost 150,000· 0 strategy articles
 Total (Special)Rarity (Mega)Size (Mega)Collectible (Mega)Gold countTotal (Special) + the three shared Mega items + Gold count.
- BestMax cost 200,000· 5 strategy articles
 Top CollectibleRarity (Mega)Size (Mega)Collectible (Mega)
 9-slot averageTop Collectible + the three shared Mega items + 9-slot average.
Item costs are measured values, and the Auction Simulator settlement uses the same table. You buy a set once at the set price, then restock only the items you use.